Have you taken the Smart Photo Quiz?

When was the last time you smiled and had fun as a photographer? The Smart Photo Quiz should definitely put a smile on your face...especially if you get all the answers right.

<<<CLICK HERE>>> to start your quiz.

Since we are on the topic of quizzes, here one to end this post.

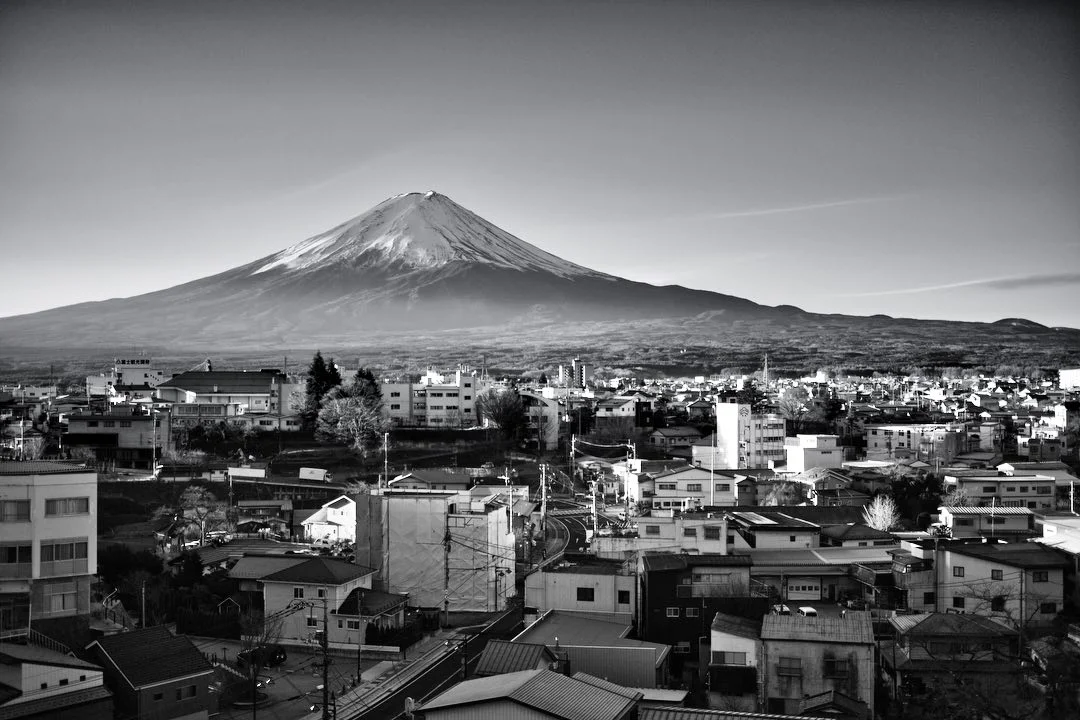
Which prime focal length lens was used to create the following image?

1) 24mm

2) 35mm

3) 105mm

MJS_8048.jpeg

Write your answer in the comments section!


Always dream big,

Matthew

P.S. Here's the photography quiz link to pass along to all your friends. www.SmartPhotoQuiz.com 


What's your favorite lens?

Recently I’ve been asked this question quite a bit. It seems everyone wants to know what gear other photographers like using. What’s your favorite camera, your favorite lens, your favorite light, these days?

Over the years I’ve had many favorite lenses, but at this very moment, I have one lens that stands out above the rest and it keeps blowing me away every time I use it.  The Nikkor 105 f/1.4 lens is one incredible lens.

850-0206.jpg


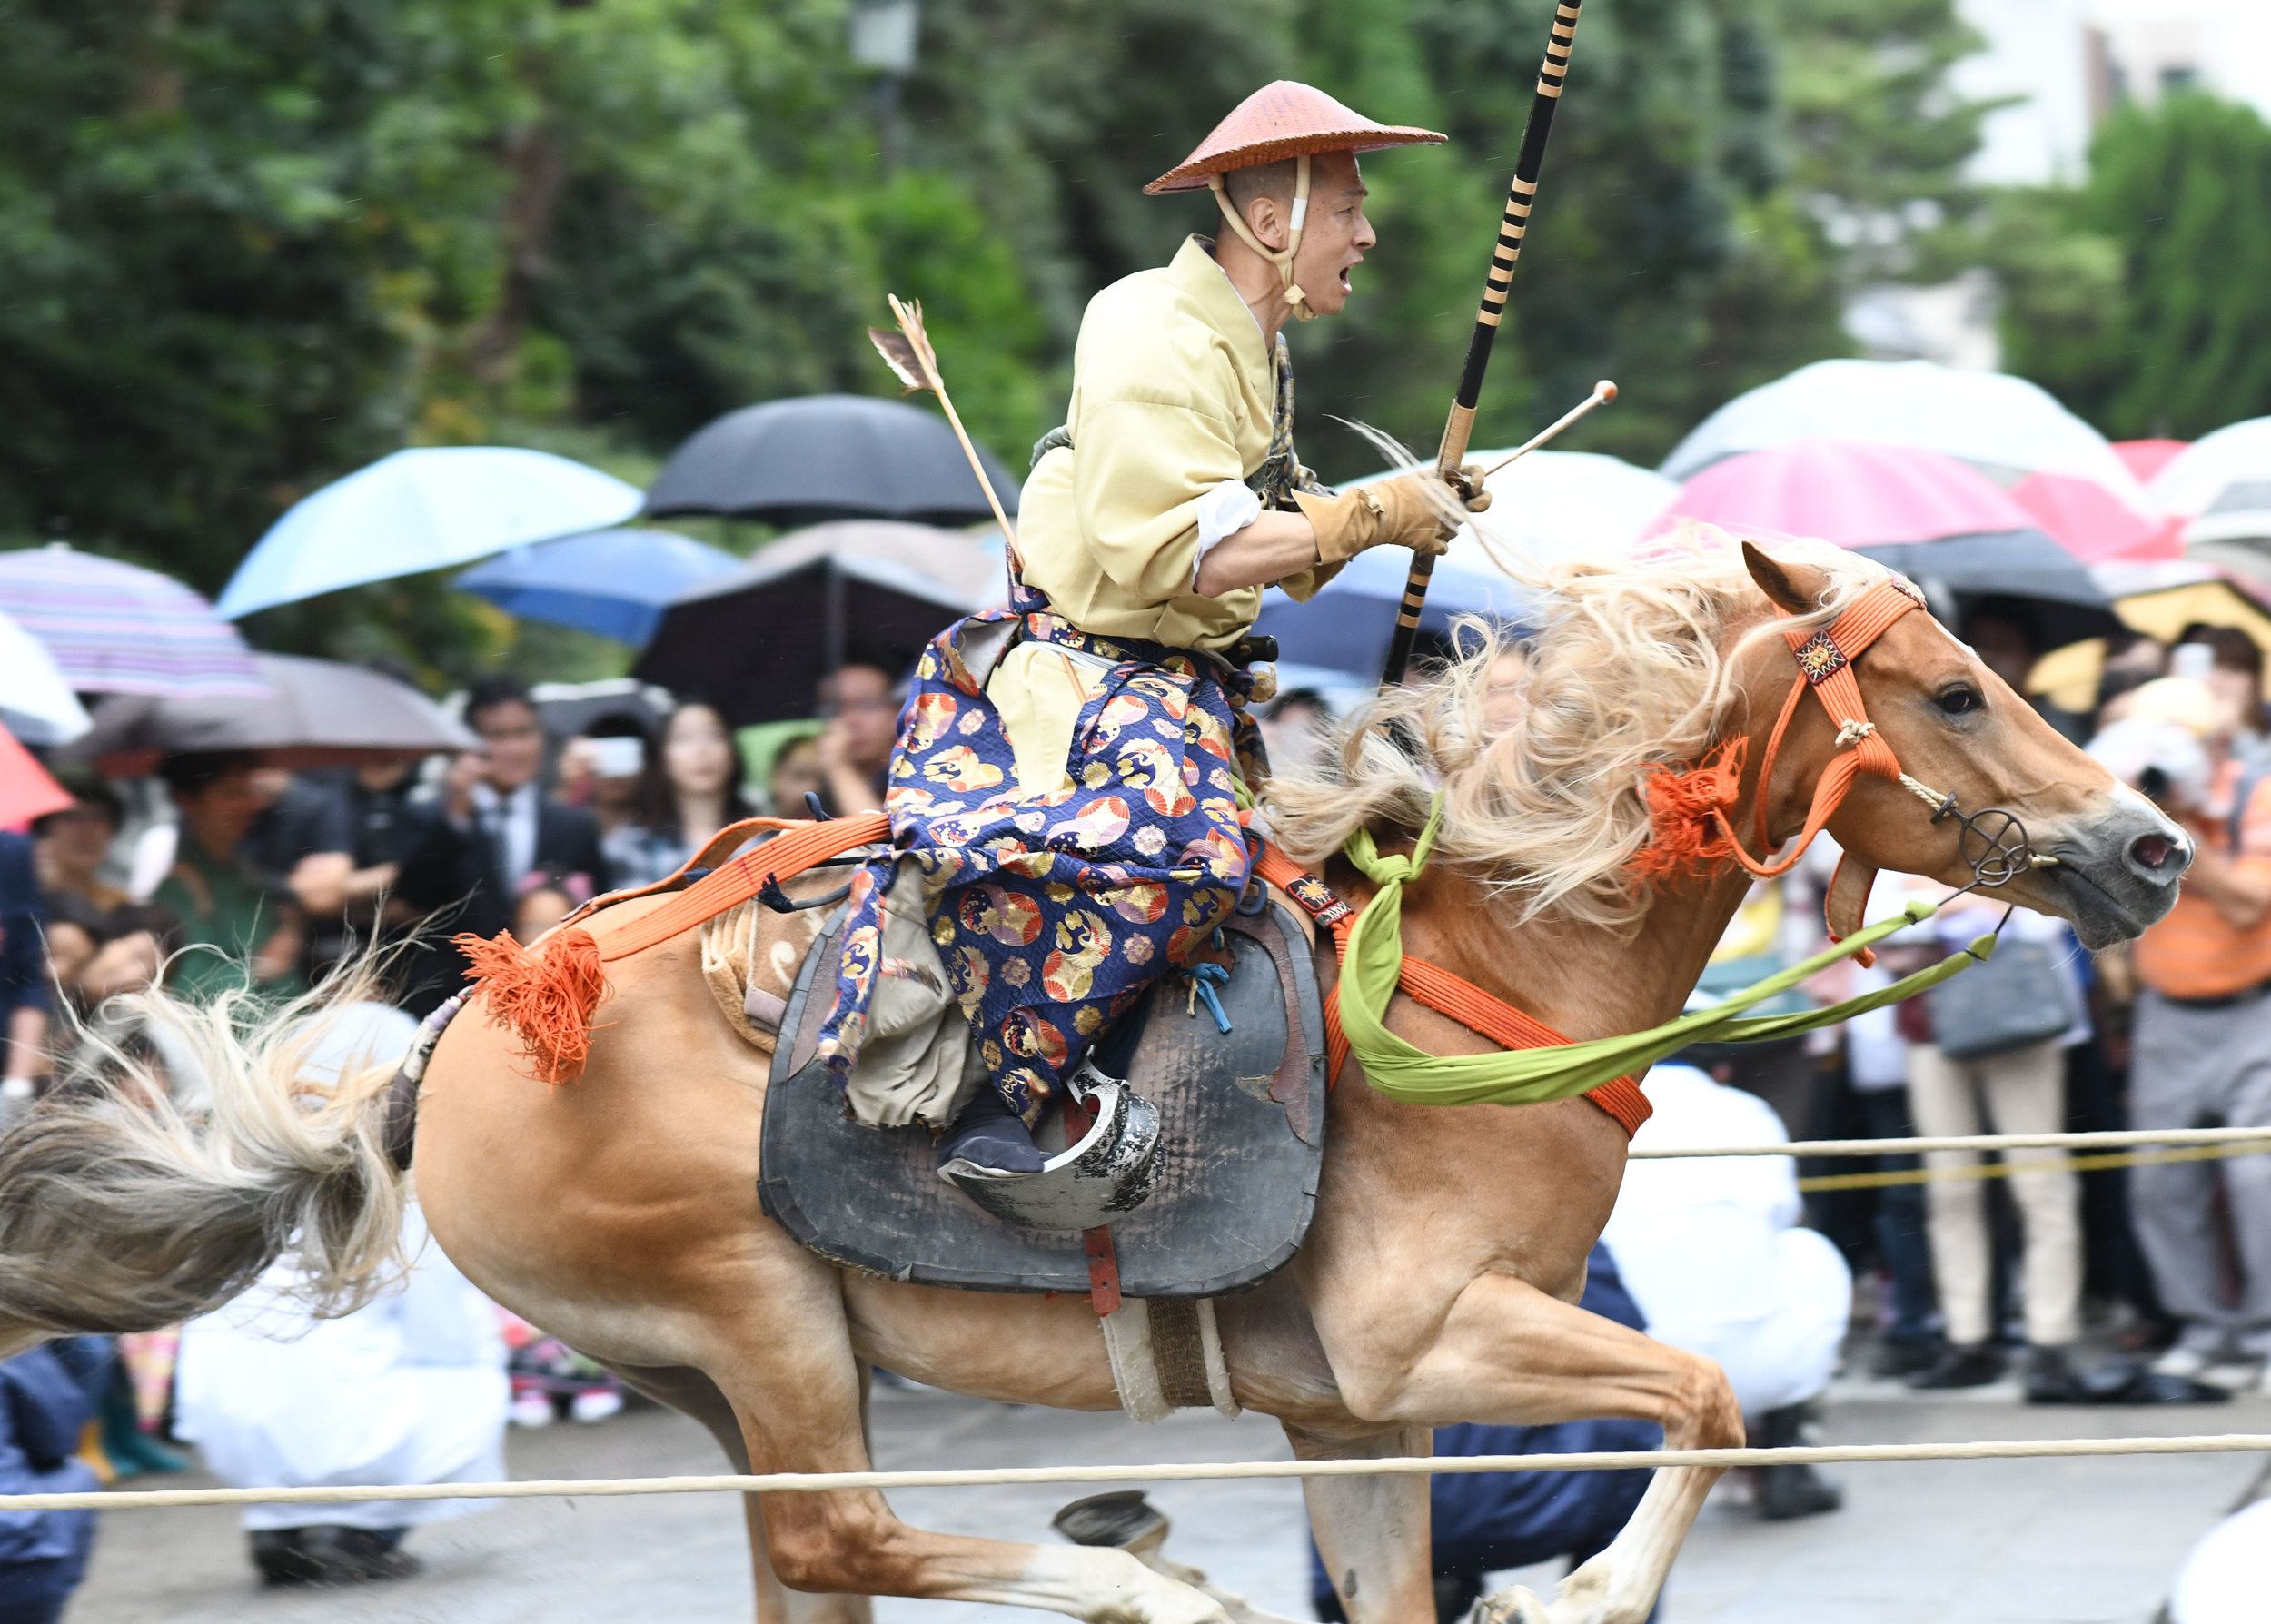
Yesterday, I went to Kamakura, Japan for the Yabusame ceremony (horseback archery), which is a traditional Japanese archery where an archer shoots arrows at three wooden targets while riding horseback. It was my first time attending this ceremony and I arrived later than I should have to get a good spot to take pictures. I took my new Nikon D850 camera and my Nikkor 105 f/1.4 lens. Before I left home, I decided to shoot at f/2.8 for the entire day. The bokeh (quality of blur) on this lens is insane and I wanted to test it in this situation.

MJS_0760A.JPG


For this ceremony, archers are dressed in beautiful Samurai attire and compete for the top honor. It is an amazing ceremony to see in person and even better to photograph.

MJS_0776.JPG
MJS_0871.JPG

After the event, I looked over my images as I took the train home. With the Nikon SnapBridge app, my images are transferred instantly to my smart-phone so I can share high-quality photographs instantly on social media or send to friends and family. I was blown away by the sharpness I was able to achieve as the archers flew by at lightning speed. The D850 camera and the 105 lens makes for a powerful combination.

For more info on photography check out the webinar this week.


Always dream big,

Matthew


Wish you had more time in the day?

I think we all wish we had more time in the day to do what we love. It seems time goes by faster and faster each year, especially as we work to grow our photography businesses. 

This week, I'm hosting a photography webinar to help you manage your time and get over any fears you may have surrounding pricing your photography. To join me on the webinar, click the link below. You'll have a chance to take part in a LIVE photography lighting exercise and have the opportunity to get in on WEEKLY LIVE TRAINING SESSIONS! 

SIGN ME UP FOR THE WEBINAR!

Photographed with the Nikon D850 and Nikkor 105 f/1.4 lens

Photographed with the Nikon D850 and Nikkor 105 f/1.4 lens

I'm coming to see you!

This week, the Next Level Photography Workshop tour begins and I'll be teaching everything I've learned about the business of photography including lighting, shooting techniques, business tips and strategies and most important believe it or not, I'm going to teach what I like to call, "beyond the gear!" This is what really makes a difference and gives you a long career in photography. Yes, you are going to learn about all the gear as well and I'm going to teach you a lot about light and you'll be able to shoot as well, so bring your gear, but this workshop is aimed to really make a difference in your photography and in your life.

If you love photography and want to learn how to have a better career, come join me as I travel all over America, Canada, and Europe to teach what I love!

Here is the list of all the cities and dates:

Click here to sign up!


April 28th: Orange County


May 1st: Portland


May 2nd: Seattle


May 4th: Vancouver, Canada


May 8th: Minneapolis, MN


May 10th: Chicago, IL


May 12th: Toronto, Canada


May 15th: Columbus, Ohio


May 16th: Indianapolis, IN


May 17th: St. Louis, Missouri


May 22nd: Washington, D.C.


May 23rd: Philadelphia, PA


May 24th: New York City


May 26th: Boston, MA


May 30th: Charlotte, NC


May 31st: Atlanta, GA


June 1st: Nashville, TN


June 3rd: Orlando, Fl


June 6th: Houston, TX


June 7th: Dallas, TX


June 8th: Austin, TX


June 10th: Phoenix, Az


June 12th: San Francisco, CA


June 14th: Los Angeles, CA


June 19th: London


June 21st: Amsterdam


Click here to sign up for the Next Level Tour!


Spring is here!

This year I'm more in tune with the changing seasons than ever before. It's been a while since I've been able to really enjoy spring and I didn't realize how I missed it. In Japan, the entire country celebrates with Hanami, when friends, family, and co-workers come out to eat and celebrate under the cherry blossoms. 

It's an amazing time to experience. I shot every day with my Nikon D500 and D5. I used two of my favorite lenses, the 35mm 1.4 Nikkor lens and the 85mm 1.4 Nikkor lens. 

Hanami in Tokyo

Hanami in Tokyo

How to take better pictures and make more money in photography

To end 2016, I am hosting TWO LIVE Master Class sessions online and they're totally FREE.

The first MASTER CLASS takes place today starting at 4:00 p.m. PST, but come 15 minutes early for the pre-party and make sure you get the FREE Master Class Workbook.

Register here: Today's Master Class


The second MASTER CLASS takes place on Thursday, starting at 1:00 p.m. PST. 

Register here. THURSDAY MASTER CLASS 

Date: December 15th

Always dream big,

Matthew

Black Friday Photography Deals

 If you live in America, I hope you had a great Thanksgiving holiday, but even if you don't you can still take advantage of the great photo deals for Black Friday and Cyber Monday.

One of my favorite programs, Perfectly Clear is on sale at a great price. If you're not familiar with Perfectly Clear, it's an amazing plug-in that works with Lightroom and Photoshop to save you time with retouching. 

Imagine doing a photo shoot where you shot 1000 images. With Perfectly Clear, you can retouch just one of those pictures in about 5 minutes or less, then apply that retouching to the other 999 images quickly and easily. That's the beauty of Perfectly Clear and over the next few days, you can get it for an insane price.  Click here for the Perfectly Clear deal.


Are you thinking of going to Vegas next February for the 2017 WPPI photo convention? You can get 15% off any WPPI Master Class if you register by Friday night.  Click here to register.


Lastly, today we kick off a FREE 3-Part Photography Training Series starting with VIDEO #1. Over the next week, we will release 3 FREE training videos to help you enhance your photography and start 2017 off right.


Always dream big,

Matthew

4 Photography Mistakes And How To Avoid Them

I think every photographer starts off wanting to learn as much about photography as possible, and this is a good thing. The more you know the better your images will be, right?

4 Photography Mistakes And How To Avoid Them - Day 4

# 4: I Can Do It All

Just because you can do it all doesn't mean you should. As a matter of fact, the more focused you are in photography the better your career will be. You don't need to do it all, just focus on what you enjoy doing most and put all of your energy into that.

If I could start my career all over again with my current knowledge, I would focus on shooting what I enjoy most and only shoot that. For example, if you love cooking and love taking pictures of food, only shoot pictures of food. To go even deeper, maybe you love baking desserts vs just taking pictures of food in general. You'd focus on photographing beautiful desserts and master it vs just photographing food. 

Find your special niche and work to be the best you can in your specific niche of photography.

Always dream big,

Matthew

4 Photography Mistakes And How to Avoid Them - Day 3

Earlier this year I was speaking at a photo convention in Japan. There were several photographers speaking and the day before the convention started we had a rehearsal session. I watched as one photographer set up to do a live photo shoot. He set up his lights, took a photo, then looked at the back of his camera to see if the exposure was right. He did this for about 15 minutes trying to figure out the right exposure until he finally got close but it was still off a bit.

4 Photography Mistakes And How To Avoid Them - Day 3


# 3: I can just use the histograms or the camera display to judge my exposure

We have all done it before so don't feel bad. I mean, it's easy to look at the display on the back of your camera and think the exposure is correct, but judging your pictures this way can lead to big disappointments. Especially if you are trying to look at your camera display while shooting outside on a bright sunny day. 

The histograms give you a better view on what is correct in terms of exposure but it is still not enough information I believe. To avoid making exposure mistakes discover how to use a light meter. A light meter will never lead you wrong. Remember, numbers don't lie, but your camera display can and will fool you at times.

To learn more about light and photography, join me today for the FREE webinar/master class which take place this Tuesday, November 1st starting  at 10:00 a.m. PST 

Register here - Master Class: How Photographic Lighting Can Increase Your Income In 90 Days

Time: 10:00 a.m. PST (California) / 1:00 p.m. EST (New York)


Always dream big,


Matthew

4 Photography Mistakes And How To Avoid Them - Day 2

When I was first starting out in photography, I thought the more light I added to an image the better my image would become. I believed my pictures didn't look good because I just didn't have enough light to "fix" them .

4 Photography Mistakes And How To Avoid Them - Day 2


# 2: I Need More Light To Make Better Pictures

One of my biggest mistakes starting out in photography was buying more gear than I needed at the time. I remember thinking I needed at least three lights to make a decent picture but when I finally had three lights I still wasn't happy with my pictures. By having more lights I felt like a professional but my pictures didn't look any better. One day a mentor took me to the side and said, "Matthew before you buy any more lights learn to master using one light first!" I think that was the best advice I've ever received in my career. 

Photographic lighting is hard to see but by learning how to use one light first you begin seeing how light works. To avoid making the mistake I made, use one light in as many ways as possible. Think of the sun, which is one light source, but it gives us many different types of light. Use your one light in as many ways as possible and find out which way is your favorite. Once you find what you like, use it over and over until you master it.

To learn more about light and photography, join this week's webinar/master class which take place this Tuesday at 10:00 a.m. PST 

Master Class: How Photographic Lighting Can Increase Your Income In 90 Days

Time: 10:00 a.m. PST (California) / 1:00 p.m. EST (New York)


Always dream big,


Matthew

4 Photography Lighting Mistakes And How To Avoid Them - Day 1

The other day I overheard two guys talking about photography in my favorite coffee shop.  One of the guys said to the other, "anyone can take a great picture on a cloudy day, it's easy!"  That statement is the inspiration for this series of blog posts.

4 Photography Mistakes And How To Avoid Them - Day 1


# 1: Anyone can take great pictures on a cloudy day: 

While it is true that the soft light on a cloudy day can make flattering pictures, the pictures are not flattering just because it's a cloudy day.  On overcast days the sun is diffused by the clouds but the sun is still giving light, it's just softened by the clouds. Think of a flashlight shining through a sheet of white paper. The paper breaks up the light from the flashlight  the same way the clouds break up the sunlight. Now here's the tricky part, on a cloudy day it is VERY HARD to see light unless you LEARN how to see light. 

Imagine today's a cloudy day and you want to take pictures at twelve noon of your friends or family. At noon on a bright sunny day, the light is not flattering because it's coming directly from above, On a cloudy day at noon, the sun is still in the same position except it have a thick layer of diffusion to soften the light, but the direction of the sun at this time of day is still not the most flattering and the eyes of your subject will be dark because the light is coming from above. 

To avoid this problem, take pictures when the direction of the sun is lower in the sky, like the first 2 to 3 hours or the last 2 to 3 hours, depending on where you are in the world and the time of year. During the winter months this time frame of good light is shorter then in the summer months. Use the Sun Seeker app to learn where the su is and use that information to your advantage. You'll discover how to see light the more you use the app and before you know it, you'll be able to see light on a cloudy day.

To learn more about light and photography, join this weeks webinar/master class which take place this Tuesday at 10:00 a.m. PST 

Master Class: How Photographic Lighting Can Increase Your Income In 90 Days

Time: 10:00 a.m. PST (California) / 1:00 p.m. EST (New York)


Always dream big,


Matthew